




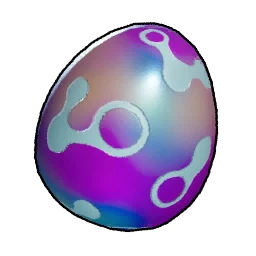



Palworld Effigies Guide: All 13 Effigy Types and What They Do
Every effigy in Palworld and what it does at the Statue of Power: Lifmunk Effigies and Capture Power, all twelve Pal Effigies added at v1.0, exact rank tables and costs from the game files, how many of each exist in the world, and where to find them.
Effigies are Palworld's permanent player upgrades: small glowing statues you collect in the world and offer at
the
 Statue of Power
to enhance your character. The
original green Lifmunk Effigy raises Capture Power, and the game's v1.0 launch added
twelve Pal Effigies — one per species — each feeding its own stat, from swim speed to sphere
homing to a hidden luck stat for wild passives. This guide covers every effigy type, the exact rank tables and
costs from the game files, how many of each exist in the world, and where to find them.
Statue of Power
to enhance your character. The
original green Lifmunk Effigy raises Capture Power, and the game's v1.0 launch added
twelve Pal Effigies — one per species — each feeding its own stat, from swim speed to sphere
homing to a hidden luck stat for wild passives. This guide covers every effigy type, the exact rank tables and
costs from the game files, how many of each exist in the world, and where to find them.
Not to be confused with Ancient Relics — the World Tree items you feed into the Ancient Relic Recycler. Those are a different system entirely; see the Ancient Relics guide.
Every effigy at a glance
Thirteen effigy types, thirteen separate enhancement tracks. Each effigy is a statuette of its namesake Pal; what it enhances, straight from the game's own Statue of Power text:
| Effigy | Enhances | Ranks | Max effect | To max | In the world |
|---|---|---|---|---|---|
 Lifmunk Effigy
|
Capture Power
Enhances Capture Power when using spheres.
|
15 | Hidden | 100 | 155 |
 Lamball Effigy
|
Satiety Duration
Makes the player less prone to hunger.
|
20 | +50% | 20 | 30 |
 Pengullet Effigy
|
Swimming Ability
Increases the player's Swim Speed and reduces stamina depletion while swimming.
|
20 | +100% | 20 | 30 |
 Munchill Effigy
|
Food Preservation
Makes food in inventory less likely to spoil.
|
20 | +50% | 20 | 30 |
 Rooby Effigy
|
Jump Power
Increases the player's Jump Power.
|
20 | +50% | 20 | 30 |
 Herbil Effigy
|
Flight Capacity
Increases the player's Glide Speed and reduces stamina depletion while gliding.
|
20 | +30% | 20 | 30 |
 Tanzee Effigy
|
Climbing Proficiency
Increases the player's Climb Speed and reduces stamina depletion while climbing.
|
20 | +100% | 20 | 30 |
 Depresso Effigy
|
Status Resistance
Makes the player less prone to status conditions.
|
20 | +50% | 20 | 30 |
 Cattiva Effigy
|
Endurance
Reduces stamina depletion when running while mounted.
|
20 | +50% | 20 | 30 |
 Lunaris Effigy
|
Sphere Tracking
Thrown spheres pursue their targets.
|
4 | 100% | 4 | 4 |
 Relaxaurus Effigy
|
EXP Gain
Increases EXP gained. (Some Bonus EXP exceptions apply)
|
4 | +50% | 4 | 4 |
 Yakumo Effigy
|
Rainbow Fortune
Increases the chance of wild Pals having better passive skills.
|
4 | +4% | 4 | 4 |
 Mimog Effigy
|
Movement Speed
Increases the player's Movement Speed.
|
92 | +50% | 287 | Capture bonuses |
"To max" is the total number of that effigy needed to reach the final rank. "In the world" counts every pickup placed in the game's maps — see them all on the interactive map.
The Statue of Power
Every effigy is spent at the
Statue of Power
,
unlocked at technology level 9 for 2 technology
points
and built from 20 Stone and 10 Paldium Fragments (it must be placed within a base). The same statue also handles
Pal enhancement with Pal Souls — effigies feed the player side of its menu. Enhancements are
per-character, and the statue lets you reset an enhancement track for a token gold cost.
Lifmunk Effigies: Capture Power
The classic green effigy, modeled after
 Lifmunk
. Offering them raises
Capture Power — your base catch rate with every sphere — across 15 ranks.
Costs escalate: 1 effigy for rank 1 up to 7 for rank 7, then a flat 9 per rank to rank 15, for
100 effigies total. With 155 placed across the
world (140 in the overworld, 15 inside
the World Tree), you can miss a third of them and still max the track.
Lifmunk
. Offering them raises
Capture Power — your base catch rate with every sphere — across 15 ranks.
Costs escalate: 1 effigy for rank 1 up to 7 for rank 7, then a flat 9 per rank to rank 15, for
100 effigies total. With 155 placed across the
world (140 in the overworld, 15 inside
the World Tree), you can miss a third of them and still max the track.
| Rank | 1 | 2 | 3 | 4 | 5 | 6 | 7 | 8 | 9 | 10 | 11 | 12 | 13 | 14 | 15 |
|---|---|---|---|---|---|---|---|---|---|---|---|---|---|---|---|
| Effigies | 1 | 2 | 3 | 4 | 5 | 6 | 7 | 9 | 9 | 9 | 9 | 9 | 9 | 9 | 9 |
Unlike every other effigy track, the game files don't expose Capture Power's per-rank percentage — the data table drives only the costs, and the actual capture-rate multiplier is computed in the game's code. In-game you only ever see the rank gauge.
The eight 20-rank Pal Effigies
Eight of the v1.0 Pal Effigies work identically: 1 effigy per rank, 20 ranks, with the effect growing in equal steps to its cap. Each has exactly 30 pickups in the world, so you need two of every three to max the stat:
| Effigy | Stat | Per rank | At rank 20 |
|---|---|---|---|
|
Lamball Effigy
|
Satiety Duration
Makes the player less prone to hunger.
|
+2.5% | +50% |
|
Pengullet Effigy
|
Swimming Ability
Increases the player's Swim Speed and reduces stamina depletion while swimming.
|
+5% | +100% |
|
Munchill Effigy
|
Food Preservation
Makes food in inventory less likely to spoil.
|
+2.5% | +50% |
|
Rooby Effigy
|
Jump Power
Increases the player's Jump Power.
|
+2.5% | +50% |
|
Herbil Effigy
|
Flight Capacity
Increases the player's Glide Speed and reduces stamina depletion while gliding.
|
+1.5% | +30% |
|
Tanzee Effigy
|
Climbing Proficiency
Increases the player's Climb Speed and reduces stamina depletion while climbing.
|
+5% | +100% |
|
Depresso Effigy
|
Status Resistance
Makes the player less prone to status conditions.
|
+2.5% | +50% |
|
Cattiva Effigy
|
Endurance
Reduces stamina depletion when running while mounted.
|
+2.5% | +50% |
The three movement stats — Swimming Ability, Flight Capacity, and Climbing Proficiency — do double duty: each raises speed and cuts stamina drain for its activity, so they're worth far more than the raw percentage suggests. Endurance (Cattiva's stat) is specifically sprint stamina while mounted.
The three rare effigies — only 4 each
Three effigies have just 4 ranks and exactly 4 copies in the entire world — no spares. Every one you find matters, and their effects are the strongest in the system:
| Effigy | Stat | Rank 1 | Rank 2 | Rank 3 | Rank 4 |
|---|---|---|---|---|---|
|
Lunaris Effigy
|
Sphere Tracking
Thrown spheres pursue their targets.
|
25% | 50% | 75% | 100% |
|
Relaxaurus Effigy
|
EXP Gain
Increases EXP gained. (Some Bonus EXP exceptions apply)
|
+12% | +25% | +37% | +50% |
|
Yakumo Effigy
|
Rainbow Fortune
Increases the chance of wild Pals having better passive skills.
|
+1% | +2% | +3% | +4% |
-
Sphere Tracking (
 Lunaris
) makes
thrown spheres home in on their target — at rank 4 a sloppy throw still connects.
Lunaris
) makes
thrown spheres home in on their target — at rank 4 a sloppy throw still connects.
-
EXP Gain (
 Relaxaurus
) is a
straight +50% experience at rank 4 — four pickups for a permanent leveling boost.
Relaxaurus
) is a
straight +50% experience at rank 4 — four pickups for a permanent leveling boost.
-
Rainbow Fortune (
 Yakumo
)
quietly improves the passive skills wild Pals spawn with — small numbers, but it applies to every wild Pal
you ever catch.
Yakumo
)
quietly improves the passive skills wild Pals spawn with — small numbers, but it applies to every wild Pal
you ever catch.
Mimog Effigies: Movement Speed
The
 Mimog
Effigy is the odd one out: it is
never found in the world. Instead, one "suddenly comes into your possession" each time you
complete a species' capture bonus — the same capture counter that grants bonus EXP for catching multiples of the
same Pal. It feeds the longest track in the game: Movement Speed, 92 ranks, +0.5% per rank up
to +45% at rank 90, then +46% at rank 91 and a final jump to +50% at rank 92. Rank 1 costs a
single effigy, ranks 2–79 cost 3 each, and ranks 80–92 cost 4 — 287 Mimog Effigies to finish,
which means completing capture bonuses across essentially the whole Palpedia.
Mimog
Effigy is the odd one out: it is
never found in the world. Instead, one "suddenly comes into your possession" each time you
complete a species' capture bonus — the same capture counter that grants bonus EXP for catching multiples of the
same Pal. It feeds the longest track in the game: Movement Speed, 92 ranks, +0.5% per rank up
to +45% at rank 90, then +46% at rank 91 and a final jump to +50% at rank 92. Rank 1 costs a
single effigy, ranks 2–79 cost 3 each, and ranks 80–92 cost 4 — 287 Mimog Effigies to finish,
which means completing capture bonuses across essentially the whole Palpedia.
Where to find every effigy
Lifmunk Effigies are scattered across every region of the game, but each Pal Effigy species concentrates in its own part of the map — roughly matching where its namesake Pal lives. Every placement is plotted on the interactive world map (toggle the effigy layers in the sidebar):
| Effigy | Count | Where |
|---|---|---|
|
Lifmunk Effigy
|
155 | Everywhere — all across the Palpagos Islands, Sakurajima, Feybreak, Terraria, and even inside the World Tree |
|
Lamball Effigy
|
30 | The starting islands — Bamboo Groves, Verdant Brook, Twilight Dunes, and the southern coasts |
|
Pengullet Effigy
|
30 | Coastlines and cold water — Dry Sandy Beach, the Frostbound Mountains, and around Mount Obsidian |
|
Munchill Effigy
|
30 | Heavily concentrated in the Desiccated Dunes |
|
Rooby Effigy
|
30 | The Abandoned Ruins and the Astral Mountains |
|
Herbil Effigy
|
30 | Sakurajima — the Northern Rock Field, Mushroom Wetlands, and around the Dancing Sakura Shrine |
|
Tanzee Effigy
|
30 | Feybreak — around the Shipwreck, Emberstone Plateau, and the Scorched Ashland |
|
Depresso Effigy
|
30 | All 30 sit in the Loess Plains of Terraria |
|
Cattiva Effigy
|
30 | All 30 are inside the World Tree |
|
Lunaris Effigy
|
4 | Four singletons on the starting islands — Gobfin's Turf, Twilight Dunes, Crescent Moon Shore, and the Fortress Ruins |
|
Relaxaurus Effigy
|
4 | Four singletons spread wide — Sakurajima, the Astral Mountains foothills, the Desiccated Dunes, and Dry Sandy Beach |
|
Yakumo Effigy
|
4 | Two in the overworld (Crystalized Ancient Tree, Loess Plains) and two inside the World Tree |
|
Mimog Effigy
|
— | Not found in the world — awarded for completing capture bonuses |
What to enhance first
- Grab the three rare effigies whenever you're nearby. Twelve total pickups buy sphere homing, +50% EXP, and better wild passives permanently — by far the best value in the system.
- Offer Lifmunk Effigies as you find them. Capture Power applies to every throw, and with 155 in the world against 100 needed, there's no reason to hoard.
- Climbing and gliding pay off early. Tanzee (Feybreak) and Herbil (Sakurajima) effigies cut stamina drain on the two traversal modes you use most before flying mounts take over.
- Movement Speed maxes itself over time. Mimog Effigies arrive automatically as you fill the Palpedia — just remember to actually spend them at the statue. Catching ten of everything you meet keeps them flowing (and stacks with the capture bonus EXP).
- Hunting effigies means catching Pals anyway — plan long captures around the passives worth keeping, since Rainbow Fortune makes wild catches roll better ones.